Artillery SideWinder X2
- Klipper Configuration
- Ultimaker Cura configuration
- Octoprint specific configuration
- Filament set up
- Klipper firmware update
- Resources / Links
Octoprint backup archive
[2024-02-08] ASWX2-backup-20240208-181211.zip
Klipper Configuration
- Klipper installation documentation
- Klipper printer.cfg file
- Klipper macros.cfg file
Ultimaker Cura configuration
Cura Printer configuration
| Printer | Extruder |
|---|---|
 |
 |
Start G-code
; Octolapse Plugin required parameters
; Script based on an original created by tjjfvi (https://github.com/tjjfvi)
; An up-to-date version of the tjjfvi's original script can be found
; here:  https://csi.t6.fyi/
; Note - This script will only work in Cura V4.2 and above!
; --- Global Settings
; layer_height = {layer_height}
; smooth_spiralized_contours = {smooth_spiralized_contours}
; magic_mesh_surface_mode = {magic_mesh_surface_mode}
; machine_extruder_count = {machine_extruder_count}
; --- Single Extruder Settings
; speed_z_hop = {speed_z_hop}
; retraction_amount = {retraction_amount}
; retraction_hop = {retraction_hop}
; retraction_hop_enabled = {retraction_hop_enabled}
; retraction_enable = {retraction_enable}
; retraction_speed = {retraction_speed}
; retraction_retract_speed = {retraction_retract_speed}
; retraction_prime_speed = {retraction_prime_speed}
; speed_travel = {speed_travel}

START_PRINT BED_TEMP={material_bed_temperature_layer_0} EXTRUDER_TEMP={material_print_temperature_layer_0}
End G-code
END_PRINT
Print profiles
Octoprint specific configuration
Bed Visualizer plugin configuration

G28
BED_MESH_CALIBRATE
@BEDLEVELVISUALIZER
BED_MESH_OUTPUT
Filament set up
PLA
| Brand | Filament desc | Printing temp | Build Plate temp | Retractation Distance |
|---|---|---|---|---|
| Geeetech | Black | 205°C | 60°C | 0.75mm |
| Geeetech | Silk Silver | 205°C | 60°C | 0.75mm |
PETG
| Brand | Filament desc | Printing temp | Build Plate temp | Retractation Distance |
|---|---|---|---|---|
| Geeetech | -- | -- | -- | -- |
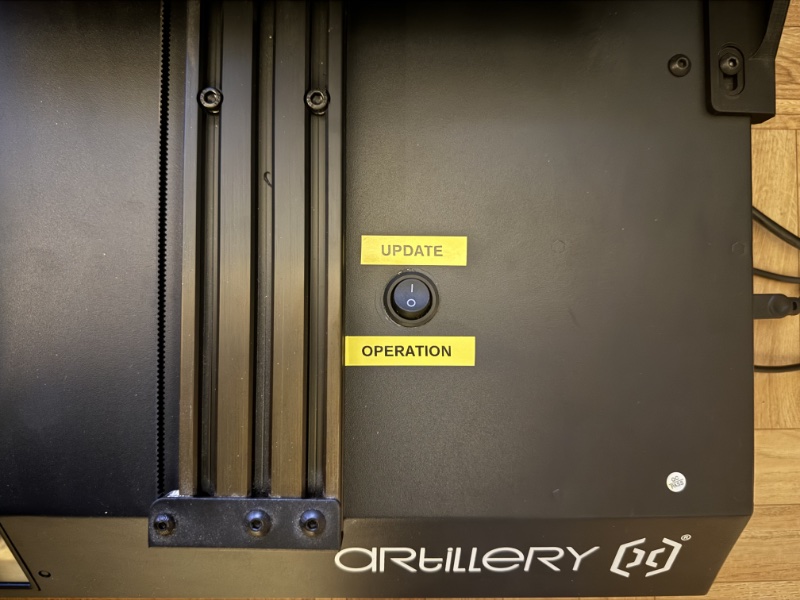
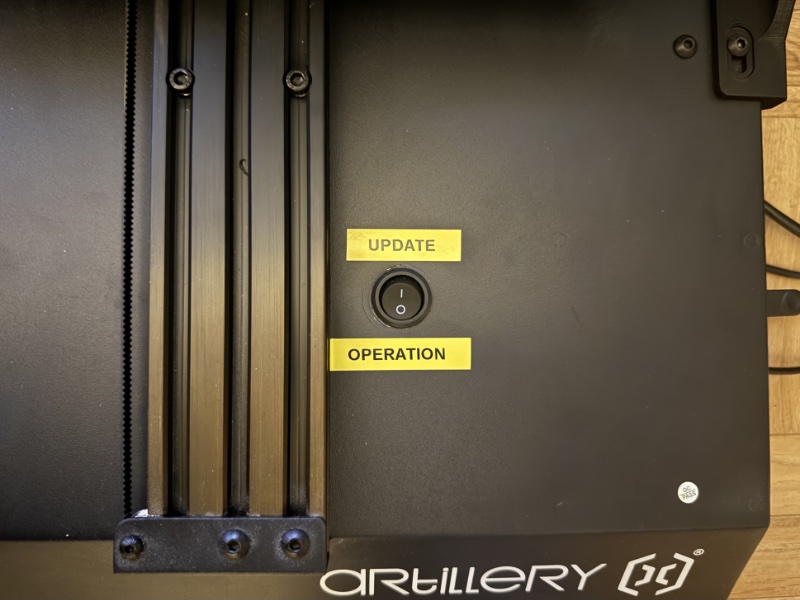
Klipper firmware update
Printer preparation
-
Power off the printer
-
Unplug the electrical wall socket
-
Unplug the USB cable labelled
OPERATIONfrom printer -
Set the top switch to
UPDATEposition
-
Plug the USB cable labelled
UPDATEto the printer

Firmware build and update
-
SSH to the ASWX2 Raspberry
-
Stop Klipper service
#> sudo service klipper stop
- Browse to Klipper directory:
#> cd ~/klipper
- Pull the last version of the Klipper firmware from Github:
#> git pull
- Clean up working directory before building firmware
#> make clean
- Check the firmware build configuration
#> make menuconfig

- Build the firmaware:
#> make
- Check printer's Ruby board is in DFU mode and can be updated
#> lsusb

-
Note the Ruby board device ID. In example above:
ID: 0483:df11 -
Flash the new firmware to the printer's Ruby board using the above device ID:
#> make flash FLASH_DEVICE=0483:df11

- Restart Klipper service
#> sudo service klipper start
- Check Klipper service is properly restarted
#> sudo service klipper status

Switch back printer to operation mode
-
Unplug the USB cable labelled
UPDATEfrom printer -
Set the top switch to
OPERATIONposition
-
Plug the USB cable labelled
OPERATIONto the printer -
Plug the electrical wall socket

Resources / Links
- Runout sensor bracket SIDEWINDER X2 by LeLudoLAb - Thingiverse
- Schéma pinout Artillery Ruby v1.2 (Genius Pro, Sidewinder X2, Hornet)
- How to install Klipper on ASWX2 - List of links (Shaarli)
- [SW X2] Renforts axe Z - Tutoriels et améliorations pour Artillery - Forum pour les imprimantes 3D et l'impression 3D
- [Tuto] Remplacer 3DTouch Artillery par un vrai BLTouch - Tutoriels et améliorations pour Artillery - Forum pour les imprimantes 3D et l'impression 3D
- Améliorations Sidewinder à imprimer
- Aide et ressources en français pour imprimantes 3D Artillery